Readers may recall these photos of the kitchen after our big remodel project about a year ago.


It has admittedly taken quite some time to get any of those loose ends wrapped up - but we finally have a backsplash.
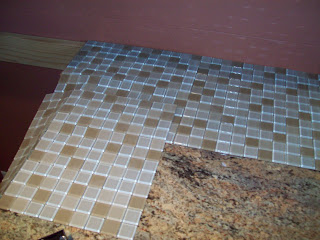
I had ordered 25 square feet of 12" x 12" sheets of 1" square mosaic glass tile from Anchor Bay Tile, and I had instructions from This Old House in hand. We'd gone to the Home Depot and picked up everything else: mortar, grout, caulk, tools. Brendon left town on Friday to go do fun Brendon-y things, and I stayed home and began the three day install.
Friday I cleared everything off the counters and pulled out the appliances (ok, Brendon helped pull the range out before he left, but we overlooked the fridge and I had to slowly scoot it out on my own). I assessed the walls, which were quite sad after the contractor's patching work last year.

I mixed up the mortar, and laid out the tile sheets.
The mortar proved slightly tricky. This was my first experience with tile or mortar, so I don't know if perhaps I didn't have the consistency quite right, but I had a rough time getting it to stick to the wall in places and it made a humongous mess. By the end of the night, though, I had all of the sheets up.

With the small tiles, I was hoping that I would be able to fudge things enough to make the tiles fit and cover without having to make any cuts. This did not pan out as hoped. Saturday morning, I drove back to home depot and rented a wet saw. I, who have never before used a power saw, cut 30-some 1" tiles in half in my backyard. (Really, I cut a lot more than that, but I wound up with just 30-some good cuts, that were even-ish halves and not crazy wonky shapes. As I still had all my fingers and both eyes, I considered it a successful endeavor.) I stuck the halves one-by-one around the power outlets and along the bottom of the window.

The rest of Saturday, I cleaned up the mortar drippings and let the mortar finish curing.
Sunday, I grouted everything. Again there was a learning curve, particularly where it came to taking off the excess grout from the tile face. At first I sponged too much and washed the grout out of the spaces. Then I left too much of a haze and had to sand off more than I would have liked with a sanding sponge. The job was pretty forgiving, though, and it came out well. A bit of caulk around the perimeter, and the tiling was finished.


I touched up some spots with the terra cotta paint, both spots that had needed it before the backsplash project and spots that I made with wayward mortar/grout/caulk. Then I cleaned all the grit and yuck off the counters and floors, and scooted the appliances back into place.
Ta Da!


No comments:
Post a Comment